Sunday, February 19, 2012

DORA THEME BIRTHDAY PARTY IDEAS

DORA THEME BIRTHDAY PARTY
•INVITATION
•CAKE
•DECORATION
•GAMES
•PARTY FAVOUR BOXES

INVITATION
Invitation can be printed from any of the online stores. Printable dora theme invitation templates are readily available. But if u want the invitation to be personalized, softwares like Corel, adobe or maya can be used….If u aren’t tech savvy try making a back pack invitation or route map invitation.


CAKE
We can make cake of all the characters in the Dora cartoon, like belly, Teeco, dora, backpack, swiper, boots….But most kids like Dora with backpack or Dora with boots.


DECORATION
Pink, Purple or Orange colours can be used. Steamers, balloons make a party colourful. We did create banners for my daughter’s birthday.


GAMES
In all the Dora cartoon route map plays a major role. Hence we decided to have games based on the route map. We planned such tat an elder boy will play the role of swiper the fox, We drew swiper face in chart paper and attached rubber strings to it. The boy should wear the face mask and should enter the birthday party were all the kids were gathered. When the kids saw swiper everyone started shouting swiper no swiping, Swiper took away the birthday cake, He would hide the cake and the kids were to find it with the help of the route map. We created route map with maya software, With places in and around our house. The route map says :1. Forest,2.A lake full of fishes, 3.Dora’s house. For the forest, We used our open to sky area where we had plants and a cascade. We kept chirping bird toy, and the sound of the gushing water from cascade and lighting created the ambience we wanted. We have kept small toy animals around the area and the kids need to find them all.The kid who found the maximum animal toys, gets a star medal with Dora cartoon, From there they need to proceed to Lake full of fishes, that is our Lily pond in the Garden. The game here is the kids need to count the no.of red and black colour fishes.The best part is that the kids were counting the same fish again and again. A piñata was attached in the garden wall and the kids were allowed to pull the piñata and collect the candies and chocolates. The Pinata also has a clue: FIND THE STEPS. The kids should proceed to the steps inside the house. At the end of the steps there are 3 doors, the kids should find the odd one and when they open it, They will find Dora house sited on the map. For Dora’s house we placed a playhouse of our kid along with a Christmas tree with lightings. The cake was inside the house. When the kids entered we sprayed snow spray that s readily available in shops…It created a winter scene with snow fall, which the kids enjoyed a lot. The kids found the cake and took it down to the party hall. Then cake cutting.
We also played whats in the backpack game and pin the tail on swiper.


WHATS INSIDE BACKPACK
Before the party, juz to keep the kids engaged we played whats inside backpack. We did collected small things that we use in day to day life and kept it inside the backpack. The kids need to wear an eye mask and select one item and name it correctly juz by touching and feeling its shape and texture

PIN THE TAIL ON SWIPER
We drew an image of swiper on the chart and struck it on the wall. We did cut tail shapes from different colour papers. The kids should wear the eye mask and pin the tail on swiper. We used double wall stickers on the coloured tails so tat it will be easy for the kids to stick it on the chart.


PARTY FAVOUR BOXES
We did a 3d house in cardboard as return gifts for all the kids.
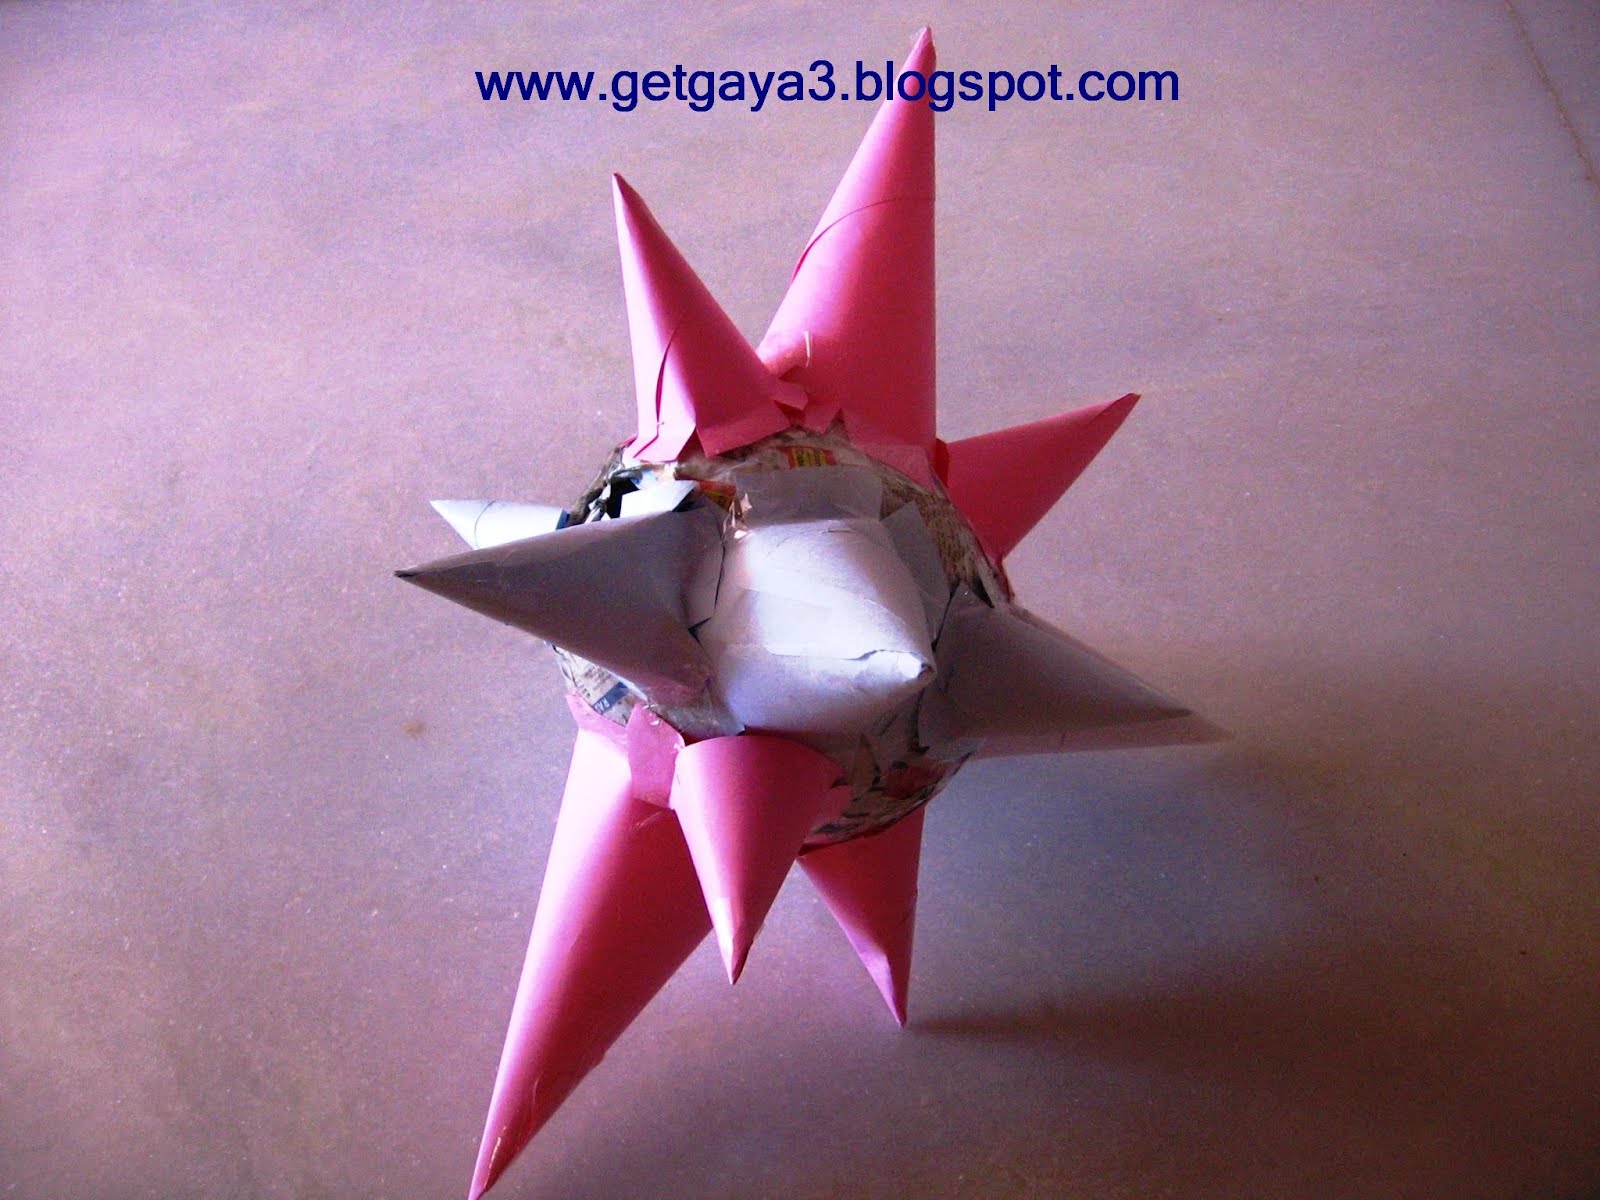

PINATA
This is the first time iam trying a piñata. And it is through Dora the explorer cartoon I learnt what is a piñata. When I did browsing I got lots of instructions and thought for making a piñata for my daughters 3rd birthday. The piñata can be of any shape a horse, a butterfly,a clown,ice cream cone, star, sun. Since this s my first try I wanted to keep it simple. Breaking the piñata s a tradition n Mexico, but I juz tried a pulling piñata.
SocialTwist Tell-a-Friend

Thursday, February 16, 2012

PINATA


PINATA
This is the first time iam trying a piñata. And it is through Dora the explorer cartoon I learnt what is a piñata. When I did browsing I got lots of instructions and thought for making a piñata for my daughters 3rd birthday. The piñata can be of any shape a horse, a butterfly,a clown,ice cream cone, star, sun. Since this s my first try I wanted to keep it simple. Breaking the piñata s a tradition n Mexico, but I juz tried a pulling piñata.
MATERIALS REQUIRED :
Balloon
Strips of news paper
Chart
Crepe papers or colour papers
Thread, jute thread or anything tats strong
Glitters, chocolates n candies to fill in the pinata
Gum : water- 2:1
PROCEDURE
Blow the balloon large enough to hold glitters chocolates n candies
Cut the newspaper into strips, apply gum and stick it on the balloon
Allow the first layer to dry for almost 12 hours, then stick second layer of newspaper strips
You can have 3 or 4 layers depending upon the size of the balloon,
SocialTwist Tell-a-Friend

Sunday, January 29, 2012

3D HOUSE


MATERIALS REQUIRED
•Chart – desired colour
•Ruler, eraser,pen
•Scissors
•Colour papers – For Roof, door, windows
PROCEDURE
•There are four pieces of chart, A and B – Building, C-Balcony, D and D1- Roof and a plain chart for base.
•Trace the parts of the building on to a chart or juz use the measurements as guidance and make an outline
•Cut only the outer area and note the asterix parts. Thses are to be folded n pasted on the outside
•Fold the outer areas of A and B chart as shown in the figure, and the roof as shown
•Add colour papers to give it a better look
•Fix the building on to a base, you can use green colour as base so tat it may look like grass.
•You can use small toy car, dog or anything to improve the look of the house.
SocialTwist Tell-a-Friend

Wednesday, January 18, 2012

DORA THEME BIRTHDAY PARTY


DORA THEME BIRTHDAY PARTY
When our kid was 2years old she was crazy about autorickshaw n train and hence we chose to have a train theme, When she was about 2.3yr old she was fond of mickey n donald....I was telling my husband that her 3rd bday theme would be these disney characters...He said dont hurry up there lot more time for that....When she was nearing 3yr she became a big fan of Dora, talking n dancing like her..Playing with back pack n boots...She literally started enacting the show everyday, she as dora n we almost became swiper,map n boots....
Atlast we concluded having a Dora theme for her third bday party. When the theme was finalised we had options to buy everything online n in stores. But i wanted the party to be very personalised n decided to do everything myself.
INVITATION:
Dora invitation printouts are available online. As i have decided to do it myself. Thought of doing a backpack or Map invitation tat leads us to the party area. Finally settled for making a back pack invitation with map.
MATERIALS REQUIRED:
Card stock paper – Purple colour
Clour papers – Red for mouth, yellow for eyebrows
Paper
Marker
Pen
PROCEDURE:
Draw the outline of the backpack on the card stock paper. Cut it along the lines.
Draw eyes on white paper with the help of marker, mouth on red n eyebrows on yellow colour paper.
Stick them and fold the card stock to look like a backpack.
Now add the details of the party inside. I juz tried to make it look like a map.
We did create another invitation tat can be sent through mail. Thanx to my cousin (www.sribalajimedias.webby.in) who spent his time to create the invitation for us.
SocialTwist Tell-a-Friend

Thursday, December 16, 2010

Christamas card


Materials Required
paper, Brown sheet, pom pom, marker n glue stick
Method
Trace ur hands n feet on to a cardboard...here i traced my little girls hands n feet...
Cut out n paste it on to another paper
draw two eyes on another sheet n paste it too
Add pompom to the nose
use stickers to decorate it
Ur christmas card is ready n u can use it as a remembrance of ur daughter.....she may love 2 see u wen she s all grown up...
SocialTwist Tell-a-Friend

Sunday, August 30, 2009

NECKLACE


PROCEDURE
The necklace is made of straw n wooden beads...bright coloured straws will look attractive
SocialTwist Tell-a-Friend

Thursday, August 20, 2009

Saturday, August 15, 2009

Sunday, August 2, 2009

COMPLEMENTARY COVER


COMPLEMENTARY COVER
Dont throw away the wedding invitations, juz reuse them as complementary covers....
SocialTwist Tell-a-Friend

Saturday, August 1, 2009

GREETING CARD


Just used safety pins n colour threads to make this card...Beads add colour n looks nice with the pins...
SocialTwist Tell-a-Friend

Saturday, July 11, 2009

GIFT BOX

SocialTwist Tell-a-Friend

Wednesday, July 8, 2009

PINWHEEL


MATERIALS REQUIRED
Construction paper, wire, bead or rubber that can be used as a stopper, pencil or wooden stick
PROCEDURE•Take your square construction paper and draw a diagonal from the top left corner to the bottom right corner and from the top right corner to the bottom left corner.
•Make a hole in the center. Use a compass and draw a circle around the center point that measures about 3 cm. Cut each of the lines from the corner to the circle.
•Punch a small hole on the side of each corner as shown in the picture.
•Coil your wire around the wooden stick. Attach a wooden ball to the wire and then insert the wire through small hole in the center of your paper
•Start with one corner and bend the paper over so that the wire can be inserted into the punched hole. Continue this with each of the 3 other corners.
•This is how the pinwheel looks once all of the ends are attatched to the center. Use your hand to hold it together until the next step is completed.
•Add a punched out motif to the center if desired and then another wooden ball or bead or rubber. Use the pliers to bend the remaining wire over into a loop so that the wire is secure. If done correctly the pinwheel can now spin in a breeze. If it gets caught on the stick, you may need to bend the wire some until it is sitting correct and can turn freely.
SocialTwist Tell-a-Friend

Sunday, June 28, 2009

NECKLACE WITH SEEDS


MATERIALS REQUIRED
Seeds, needle, thread, beads, varnish
PROCEDURE
•Soak the seeds in water for 24 hours. After that they may germinate.
•Soaking makes the dried seeds soft and its easy to pierce the needle through them.
•Plan the design that you are going to make and then start adding the seeds and beads inbetween.
Do the circular parts n pendant separately and attach it to the chain later. Once finished allow it to dry and apply a layer of varnish.
SocialTwist Tell-a-Friend

PAPER PEACOCK


INSTRUCTIONS
SocialTwist Tell-a-Friend

Sunday, June 14, 2009

FLOWERS

MATERIALS REQUIRED
A colourful carrier bag, Scissors ,Tape
PROCEDURE
•Take a carrier bag that's a bright colour
•The idea is to draw six or seven petal shapes - pointy ovals - onto the carrier bag.
•Cut them out carefully
•For the centre of the flower, cut out a circle from a different coloured bag. Pinch it in the middle, bunching the circle up.
•Hold it in place with some tape.This can be a bit fiddly!]
•Then, add on the petals.Put them around the edges.
•Hold two or three in position, and add on some tape.
•Keep adding petals in the same way, going around the centre, until you've created a whole flower.
•You could even twist a green bag into a long stalk, holding it in place with lots of tape.Stick the flower onto the other end!
•You can experiment with different coloured bags. and different petal shapes.
SocialTwist Tell-a-Friend

Sunday, June 7, 2009

Sunday, May 31, 2009

Sunday, May 24, 2009

Friday, May 15, 2009

ROCKING DUCK


MATERIALS REQUIRED
Scissors, Paper plates, Glue, Crayons or poster colours
PROCEDURE•For the body, cut out a circle from the edge of a paper plate
•Cut out a head from the left over circle. Glue it on the body
•Fold another paper plate in half. Glue the duck onto the folded edge
•Colour the duck, Colour the folded paper palte in blue colour so that it looks like water. Now push the duck so that it rocks.
SocialTwist Tell-a-Friend

Sunday, May 10, 2009

Saturday, May 2, 2009

PAPER CUP ART

Use paper cup to make hut, castle, a clown, Christmas tree
SocialTwist Tell-a-Friend

Sunday, April 26, 2009

NECKLACE


MATERIALS REQUIRED
Shoe sole, beads, glue, scissors, paddy or any other cereal or pulse of your choice and thick black or any coloured thread, varnish
PROCEDURE
•Cut the shoe sole into any shape and this makes the pendant of your necklace.
•Now stick paddy and beads to decorate it.
•Cut the black thread to the length you want and then stick it to the backside of the pendant
•Allow it to dry and apply a thin coat of varnish on paddy so that it doesn’t deteriorate.
SocialTwist Tell-a-Friend